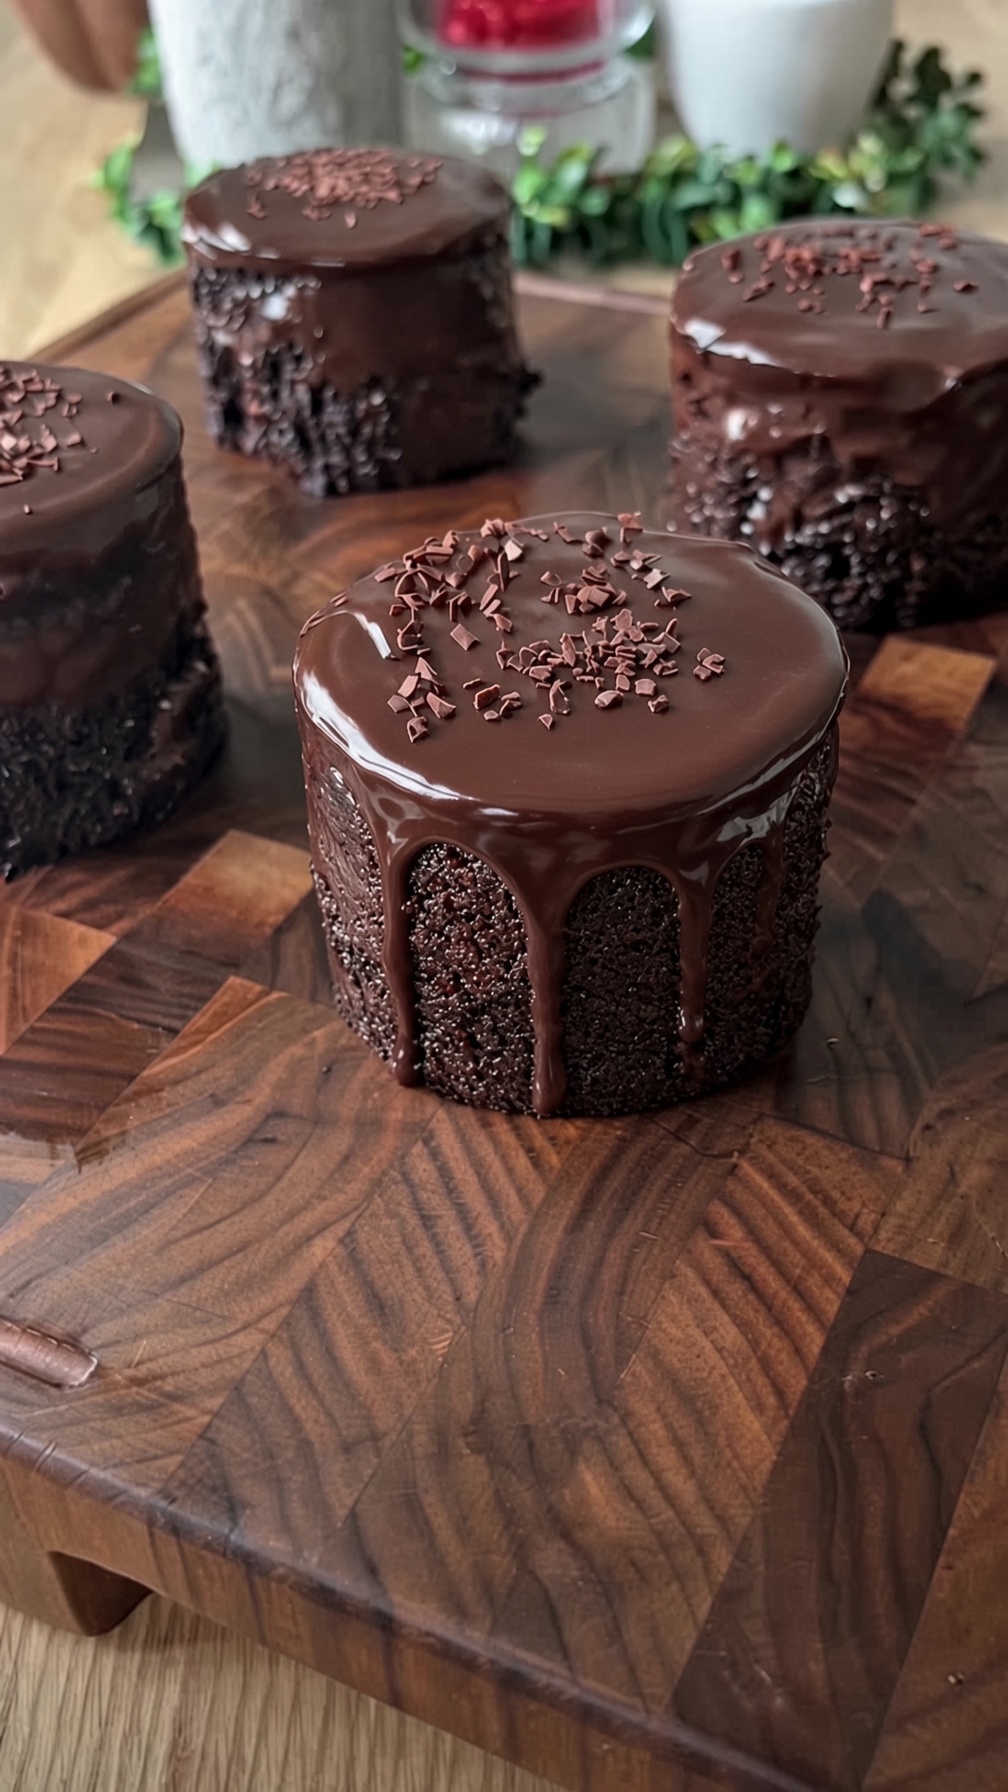
If you’re looking for a dessert that delivers serious chocolate flavor without an overly complicated presentation, this Ultimate Chocolate Ganache Cake is exactly that kind of recipe.
The concept centers around three irresistible components:
Chocolate Cake • Chocolate Ganache • Chocolate Shavings
A deeply chocolatey cake provides the soft, moist base. Silky ganache creates the luxurious finish, while chocolate shavings add texture and an elegant bakery-style appearance.
It’s an excellent dessert for birthdays, holidays, dinner parties, Valentine’s Day, anniversaries, or simply for anyone who believes there’s no such thing as too much chocolate.
Why You’ll Love This Chocolate Cake
- Deep chocolate flavor
- Soft, moist crumb
- Silky chocolate ganache
- Beautiful bakery-style presentation
- Simple decorating technique
- Can be prepared ahead
- Easy to customize
- Excellent celebration cake
- No complicated piping required
- Chocolate in every layer
The 3 Main Components
1. Chocolate Cake
A moist cocoa-based cake forms the foundation.
2. Chocolate Ganache
Chocolate and warm heavy cream create a smooth, glossy topping.
3. Chocolate Shavings
Chocolate curls or shavings provide the finishing touch.
While those are the three stars of the dessert, you’ll need a few basic baking ingredients to make the cake from scratch.
Ingredients
For the Chocolate Cake
- 2 cups all-purpose flour
- 1¾ cups granulated sugar
- ¾ cup unsweetened cocoa powder
- 2 teaspoons baking soda
- 1 teaspoon baking powder
- 1 teaspoon salt
- 2 large eggs, room temperature
- 1 cup buttermilk, room temperature
- ½ cup vegetable or canola oil
- 2 teaspoons vanilla extract
- 1 cup hot coffee or hot water
For the Chocolate Ganache
- 12 ounces semi-sweet chocolate, finely chopped
- 1 cup heavy cream
- 1 teaspoon vanilla extract, optional
- Pinch of salt, optional
For the Chocolate Shavings
- 3–4 ounces semi-sweet or dark chocolate
Optional Decorations
- Fresh strawberries
- Raspberries
- Chocolate curls
- Mini chocolate chips
- Cocoa powder
- Whipped cream
Why This Cake Uses Oil
Butter provides wonderful flavor, but oil is particularly useful in chocolate cake because it helps produce a soft, moist crumb even after refrigeration.
That’s especially useful here because ganache cakes are often refrigerated before slicing.
A neutral-flavored oil such as vegetable or canola oil works best.
Why Buttermilk Works So Well
Buttermilk contributes moisture and acidity.
The acidity works with the baking soda while giving the cake a tender crumb.
If possible, use full-fat cultured buttermilk for a rich result.
Why Add Hot Coffee?
Coffee is not included to turn this into a coffee cake.
Its purpose is to complement the cocoa and deepen the perception of chocolate flavor.
The finished cake shouldn’t necessarily taste strongly of coffee.
If you don’t want to use coffee, substitute an equal amount of hot water.
How to Make Ultimate Chocolate Ganache Cake
Step 1: Prepare the Oven
Preheat your oven to 350°F (175°C).
Grease two 9-inch round cake pans.
Line the bottoms with parchment paper.
Lightly grease the parchment as well.
Step 2: Combine the Dry Ingredients
In a large mixing bowl, whisk together:
- Flour
- Sugar
- Cocoa powder
- Baking soda
- Baking powder
- Salt
Break up any visible cocoa lumps.
Step 3: Combine the Wet Ingredients
In a separate bowl, whisk together:
- Eggs
- Buttermilk
- Oil
- Vanilla
Mix until smooth.
Step 4: Combine Wet and Dry
Pour the wet mixture into the dry ingredients.
Mix on low speed or whisk gently until mostly combined.
Avoid aggressively beating the batter.
Step 5: Add the Hot Coffee
Slowly pour in the hot coffee while mixing gently.
The batter will become relatively thin.
That’s normal.
Don’t add extra flour simply because the batter looks looser than a traditional butter-cake batter.
Step 6: Divide the Batter
Divide evenly between the prepared cake pans.
For especially even layers, use a digital kitchen scale to weigh the batter in each pan.
Step 7: Bake
Bake for approximately 28–35 minutes.
Begin checking toward the lower end of the range because ovens vary.
The cakes are ready when the center springs back lightly and a toothpick inserted near the center comes out with a few moist crumbs rather than wet batter.
Step 8: Cool
Let the cakes cool in their pans for approximately 10–15 minutes.
Carefully turn them onto cooling racks.
Remove the parchment.
Allow the layers to cool completely before adding ganache.
This is important.
Ganache placed over a warm cake can melt excessively and slide away.
Making Silky Chocolate Ganache
Ganache sounds sophisticated, but the basic technique is surprisingly simple.
Chocolate and warm cream are combined to form an emulsion.
The temperature and chocolate-to-cream ratio determine whether the ganache becomes a glaze, frosting, filling, or truffle-like mixture.
Step 9: Chop the Chocolate
Finely chop the semi-sweet chocolate.
Place it in a heatproof bowl.
Smaller pieces melt more evenly than large chunks.
Step 10: Heat the Cream
Pour the heavy cream into a small saucepan.
Heat gently until steaming and just beginning to show bubbles around the edges.
Don’t aggressively boil it.
Step 11: Pour Over Chocolate
Pour the hot cream over the chopped chocolate.
Make sure most of the chocolate is submerged.
Leave it undisturbed for approximately 2–3 minutes.
Step 12: Stir Slowly
Begin stirring gently from the center.
Gradually work outward.
The mixture should transform into smooth, glossy ganache.
Add vanilla and a tiny pinch of salt if desired.
Step 13: Let the Ganache Thicken
The ganache will initially be relatively fluid.
Let it cool until it reaches a thick but spreadable consistency.
This can take approximately 20–40 minutes depending on room temperature, bowl size, and chocolate.
Assemble the Cake
Step 14: Level the Layers if Needed
If the cakes have pronounced domes, use a long serrated knife to carefully level them.
Don’t remove more cake than necessary.
Step 15: Add the First Layer
Place one chocolate cake layer on a cake stand or serving plate.
Step 16: Add Ganache
Spread a layer of ganache across the top.
Don’t make the filling excessively thick or the upper layer may slide.
Step 17: Add the Second Layer
Place the second cake layer on top.
Gently align it.
Step 18: Cover with Ganache
Spread the remaining ganache over the top and sides.
For a rustic appearance, create gentle swirls with an offset spatula.
For a smoother finish, warm the spatula slightly, dry it completely, and glide it gently over the ganache.
Step 19: Make Chocolate Shavings
Use a vegetable peeler along the edge of a chocolate bar.
Depending on the chocolate temperature and pressure, you’ll create:
- Fine shavings
- Small curls
- Larger ribbons
Step 20: Decorate
Scatter the chocolate shavings generously across the top.
You can also press a few around the sides.
For a clean minimalist cake, keep the decoration almost entirely chocolate.
Step 21: Let It Set
Allow the ganache to firm before slicing.
If the room is warm, refrigerate the cake briefly.
For the best eating texture, let a refrigerated cake sit at room temperature for a short period before serving.
The Three Chocolate Elements That Make This Cake Special
This dessert isn’t simply chocolate cake with frosting.
Each chocolate component contributes something different.
The cake provides softness.
The ganache provides richness and creaminess.
The shavings provide texture and visual contrast.
Together, they create a dessert that looks elaborate without requiring advanced cake-decorating skills.
Choosing the Best Cocoa Powder
Cocoa is one of the most important ingredients because it provides much of the cake’s chocolate flavor.
You’ll generally encounter two major types:
| Cocoa | Flavor | Color | Best Use |
| Natural cocoa | Bright, classic | Medium brown | Traditional chocolate cake |
| Dutch-process cocoa | Smooth, mellow | Darker | Deep chocolate desserts |
| Black cocoa | Intense, distinctive | Very dark | Specialty cakes |
Because leavening chemistry varies between cocoa types, use the cocoa specified by a tested recipe rather than swapping varieties indiscriminately.
Semi-Sweet Chocolate for Ganache
Semi-sweet chocolate is an excellent default because it balances sweetness and cocoa intensity.
It also pairs well with the sweet cake underneath.
Choose chocolate you enjoy eating on its own.
Ganache contains very few ingredients, so the chocolate’s flavor is noticeable.
Dark Chocolate Ganache
For a less-sweet dessert, use dark chocolate.
The result will be:
- More intense
- Slightly less sweet
- More sophisticated in flavor
Chocolate percentage affects how the ganache behaves, so very high-cocoa chocolate may require adjustments to achieve your preferred consistency.
Milk Chocolate Ganache
Milk chocolate creates a sweeter and softer flavor.
Because milk chocolate contains more sugar and milk solids than dark chocolate, it doesn’t behave exactly the same in ganache.
You may need a higher proportion of chocolate relative to cream for a firm frosting consistency.
White Chocolate Variation
White chocolate can create dramatic visual contrast.
Make the cake and dark ganache normally, then finish with white chocolate shavings.
The dark-and-white combination looks particularly attractive for celebrations.
Why Ganache Sometimes Separates
A broken ganache can look:
- Oily
- Grainy
- Dull
Common causes include excessive heat or an unstable chocolate-and-cream emulsion.
Stir gently rather than aggressively.
If the mixture begins separating, a small amount of warm cream incorporated gradually can sometimes help restore the emulsion.
Why Ganache Is Too Thin
Freshly made ganache is naturally fluid.
Before assuming something went wrong, give it time to cool.
As the chocolate cools, the ganache thickens considerably.
If it’s intended for frosting, don’t pour it onto the cake immediately.
Why Ganache Is Too Thick
If the ganache becomes too firm to spread, warm it very gently.
Short warming intervals are safer than overheating the entire bowl.
Stir after each interval.
Pourable vs. Spreadable Ganache
Temperature changes everything.
Warm ganache is ideal for:
- Drips
- Glazes
- Pouring
Cooler ganache works better for:
- Filling
- Spreading
- Frosting
Very cool ganache can become firm enough to whip.
Whipped Chocolate Ganache
Want a lighter filling?
Allow the ganache to cool until thickened, then whip briefly with an electric mixer.
It becomes lighter in color and fluffier in texture.
Don’t overwhip it.
Chocolate Ganache Drip Cake
Instead of completely covering the cake in ganache, frost it first and use slightly warm ganache around the top edge.
Allow small drips to travel down the sides.
Finish the center with chocolate shavings.
Triple Chocolate Cake
The original version is already essentially a triple-chocolate dessert:
Chocolate cake + chocolate ganache + chocolate shavings.
But you can intensify it further by adding chocolate chips between the layers.
Chocolate Raspberry Cake
Chocolate and raspberries pair beautifully.
Spread a thin layer of raspberry preserves beneath the ganache filling.
Decorate with fresh raspberries.
The fruit’s acidity provides contrast against the rich chocolate.
Chocolate Strawberry Cake
Add sliced strawberries between the layers shortly before serving, or decorate the top with whole strawberries.
If using fresh fruit inside the cake, refrigeration and prompt serving become more important.
Black Forest-Inspired Variation
Add cherries between the layers and finish with chocolate shavings.
Whipped cream can be incorporated for a Black Forest-inspired presentation.
Chocolate Caramel Cake
Add a thin caramel layer between the cake and ganache.
Finish with a light caramel drizzle.
Because cake, chocolate, and caramel are all rich, a little caramel goes a long way.
Chocolate Peanut Butter Cake
Spread a thin layer of peanut butter frosting between the chocolate cake layers.
Cover the exterior with ganache.
Finish with chocolate shavings and chopped peanuts.
Chocolate Espresso Cake
For stronger coffee notes, add espresso powder to the cake batter or ganache.
Unlike the subtle coffee used to deepen chocolate flavor, this variation intentionally makes the coffee noticeable.
Chocolate Orange Cake
Add finely grated orange zest to the cake.
A small amount of orange extract can also be added carefully.
Chocolate and orange create a particularly good holiday combination.
Mint Chocolate Cake
Add a small amount of peppermint extract to the ganache.
Peppermint extract is strong, so use it conservatively.
Finish with dark chocolate shavings.
Cookies-and-Cream Variation
Add crushed chocolate sandwich cookies between the layers or around the bottom edge.
Keep some larger pieces for decoration.
Can You Add Chocolate Chips to the Batter?
Yes.
Fold approximately 1 cup semi-sweet chocolate chips into the batter before baking.
Tossing them lightly with flour can help distribute them, although sinking can still occur in thinner batters.
How to Keep Chocolate Cake Moist
Several details matter:
- Measure flour accurately
- Don’t overmix
- Use oil
- Use buttermilk
- Don’t overbake
- Cool properly
- Store covered
Overbaking is one of the most common reasons homemade chocolate cake becomes dry.
Why a Digital Kitchen Scale Helps
Flour can be packed accidentally into measuring cups.
Too much flour makes cake heavier and drier.
A digital kitchen scale provides more consistent measurements and is particularly useful if you bake frequently.
It also makes dividing batter evenly between cake pans easier.
How to Measure Flour Without a Scale
Fluff the flour.
Spoon it gently into the measuring cup.
Level the top with a straight edge.
Don’t scoop directly from a tightly packed flour container.
Room-Temperature Ingredients
Eggs and buttermilk blend more smoothly when they aren’t refrigerator-cold.
You don’t need to leave them out for hours.
A short period at room temperature is sufficient.
Don’t Overmix the Batter
Once flour is hydrated, mixing develops gluten.
Some gluten is necessary for structure.
Too much mixing can produce a tougher cake.
Mix only until the ingredients are incorporated.
Don’t Overbake
Start checking early.
You’re looking for a toothpick with a few moist crumbs—not liquid batter.
A completely dry toothpick can sometimes mean you’ve baked longer than necessary.
Cake Pan Comparison
| Pan | Result | Approximate Use |
| Two 9-inch rounds | Classic layer cake | Celebrations |
| Three 8-inch rounds | Taller layers | Bakery presentation |
| 9×13-inch pan | Easy serving | Family gatherings |
| Cupcake pan | Individual portions | Parties |
| Bundt pan | Decorative shape | Casual entertaining |
Changing pan size can change baking time, so monitor doneness rather than blindly following the original time.
9×13 Chocolate Ganache Cake
Want something easier?
Bake the batter in a suitable 9×13-inch pan.
Cool completely.
Spread ganache over the top.
Cover with chocolate shavings.
No stacking or complicated decorating is necessary.
Chocolate Ganache Cupcakes
The same concept makes excellent cupcakes.
Bake chocolate cupcakes.
Cool completely.
Top each with thickened ganache.
Finish with chocolate curls.
They’re convenient for parties because no slicing is required.
How to Make Beautiful Chocolate Shavings
Start with a room-temperature chocolate bar.
Use a vegetable peeler along the edge.
For delicate shavings, use lighter pressure.
For larger curls, slightly warmer chocolate often works better.
If the chocolate becomes too soft, refrigerate briefly.
Easy Decorating Technique
You don’t need piping bags or professional equipment.
Spread ganache naturally over the cake.
Create a few soft swirls.
Pile chocolate curls in the center.
Leave some ganache visible around the edges.
That alone creates an attractive bakery-style dessert.
Optional Chocolate Drizzle
Reserve a small amount of warm ganache.
After frosting the cake, drizzle thin lines across the top.
Then add the shavings.
This gives the surface additional texture.
Fresh Berry Decoration
For color, add:
- Strawberries
- Raspberries
Don’t overload the cake.
A small cluster of berries surrounded by chocolate shavings can look more elegant than covering the entire top.
How to Slice Ganache Cake Cleanly
Ganache can stick to a knife.
For cleaner slices:
- Run a sharp knife under hot water.
- Dry it completely.
- Slice the cake.
- Wipe the blade clean.
- Repeat.
This takes a little longer but dramatically improves presentation.
Make-Ahead Instructions
Chocolate cake is an excellent make-ahead dessert.
One Day Ahead
Bake the cake layers.
Cool completely.
Wrap tightly.
Prepare and assemble the cake later.
Fully Assembled
You can also assemble the cake in advance and refrigerate it.
Cover it carefully so it doesn’t absorb refrigerator odors.
Storing the Cake
Storage depends partly on your environment and any additional fillings used.
Because this version contains cream-based ganache, refrigeration is the safest practical choice for longer storage.
Keep it well covered.
For best quality, enjoy within approximately 3–4 days.
Serving Refrigerated Chocolate Cake
Cold ganache becomes quite firm.
For a softer, silkier texture, remove the cake from the refrigerator for a short period before serving, while still following appropriate food-safety practices.
Can Chocolate Cake Be Frozen?
Yes.
Unfrosted cake layers freeze particularly well.
Cool completely.
Wrap tightly.
Place in freezer-safe wrapping or containers.
Thaw while still wrapped to help control condensation.
Can Ganache Cake Be Frozen?
It can, although the appearance of the ganache may change slightly after thawing.
If presentation matters, freezing the plain cake layers and preparing fresh ganache later usually gives a better-looking result.
Best Drinks with Chocolate Cake
This rich dessert pairs nicely with:
- Coffee
- Espresso
- Cold milk
- Hot chocolate
- Unsweetened tea
A less-sweet beverage balances the richness particularly well.
Serving for Birthdays
For a birthday cake, add:
- Chocolate curls
- Candles
- Small chocolate pieces
You don’t need brightly colored frosting to create a celebration-worthy cake.
Valentine’s Day Version
Use strawberries or raspberries with the chocolate shavings.
A few fresh berries create a natural red-and-chocolate presentation.
Holiday Version
For winter holidays, decorate with:
- Chocolate curls
- Sugared cranberries
- Rosemary sprigs used decoratively around the serving platter rather than eaten unless prepared appropriately
Keep the main cake design simple so the glossy ganache remains the focus.
Useful Baking Equipment
Helpful tools include:
- Two 9-inch cake pans
- Parchment paper
- Large mixing bowls
- Electric hand or stand mixer
- Silicone spatula
- Whisk
- Digital kitchen scale
- Measuring cups and spoons
- Cooling racks
- Offset spatula
- Serrated cake knife
- Vegetable peeler
- Cake stand
- Airtight cake container
You don’t need every tool on the list, but an offset spatula, digital scale, and good cake pans make the process noticeably easier.
Common Chocolate Cake Problems
Cake Is Dry
Possible causes:
- Too much flour
- Overbaking
- Incorrect pan size
- Too little liquid
Cake Sank in the Middle
Possible causes:
- Underbaking
- Opening the oven too early
- Incorrect leavening measurements
Cake Stuck to the Pan
Use grease plus parchment on the bottom.
Let the cake cool briefly before removing, but don’t leave it indefinitely in the pan.
Ganache Slid Off
The cake was probably warm or the ganache was too fluid.
Cool both appropriately before assembly.
Ganache Became Hard
It became too cold.
Warm it very gently until spreadable.
Ganache Looks Oily
The emulsion may have separated.
Gentle mixing and a small amount of warm cream can sometimes bring it back together.
Frequently Asked Questions
What are the three main components?
Chocolate cake, chocolate ganache, and chocolate shavings.
Can I use boxed chocolate cake mix?
Yes. A quality chocolate cake mix is a convenient shortcut. Prepare it according to the package directions, cool completely, then add homemade ganache and chocolate shavings.
Can I make the cake without coffee?
Absolutely. Replace the coffee with hot water.
What chocolate is best for ganache?
Semi-sweet chocolate provides an excellent balance of sweetness and chocolate intensity.
Can I use chocolate chips for ganache?
They can work, although finely chopped baking chocolate often melts more predictably because chocolate chips are formulated to hold their shape during baking.
Why isn’t my ganache thickening?
It may simply still be warm. Allow more cooling time.
Can I make this as a sheet cake?
Yes. A 9×13-inch version is one of the easiest ways to make it.
Can I make cupcakes?
Yes. Top cooled chocolate cupcakes with thickened ganache and chocolate shavings.
How do I make chocolate curls?
Use a vegetable peeler along the edge of a chocolate bar.
Can I prepare it the day before?
Yes. This is an excellent make-ahead celebration dessert.
Final Thoughts
This Ultimate Chocolate Ganache Cake proves that an impressive chocolate dessert doesn’t need complicated decorations.
The entire experience revolves around three irresistible elements:
Chocolate Cake • Chocolate Ganache • Chocolate Shavings
The cake provides a soft, moist foundation. The ganache adds a rich, silky layer. And the chocolate shavings transform a simple cake into something that looks ready for a celebration.
For the best results, measure carefully, don’t overbake the cake, cool the layers completely, use good-quality chocolate, and give the ganache enough time to reach the right consistency before decorating.
Serve it with coffee, cold milk, or fresh berries and you’ve got a deeply chocolatey dessert that works just as well for a birthday table as it does for a simple weekend treat.