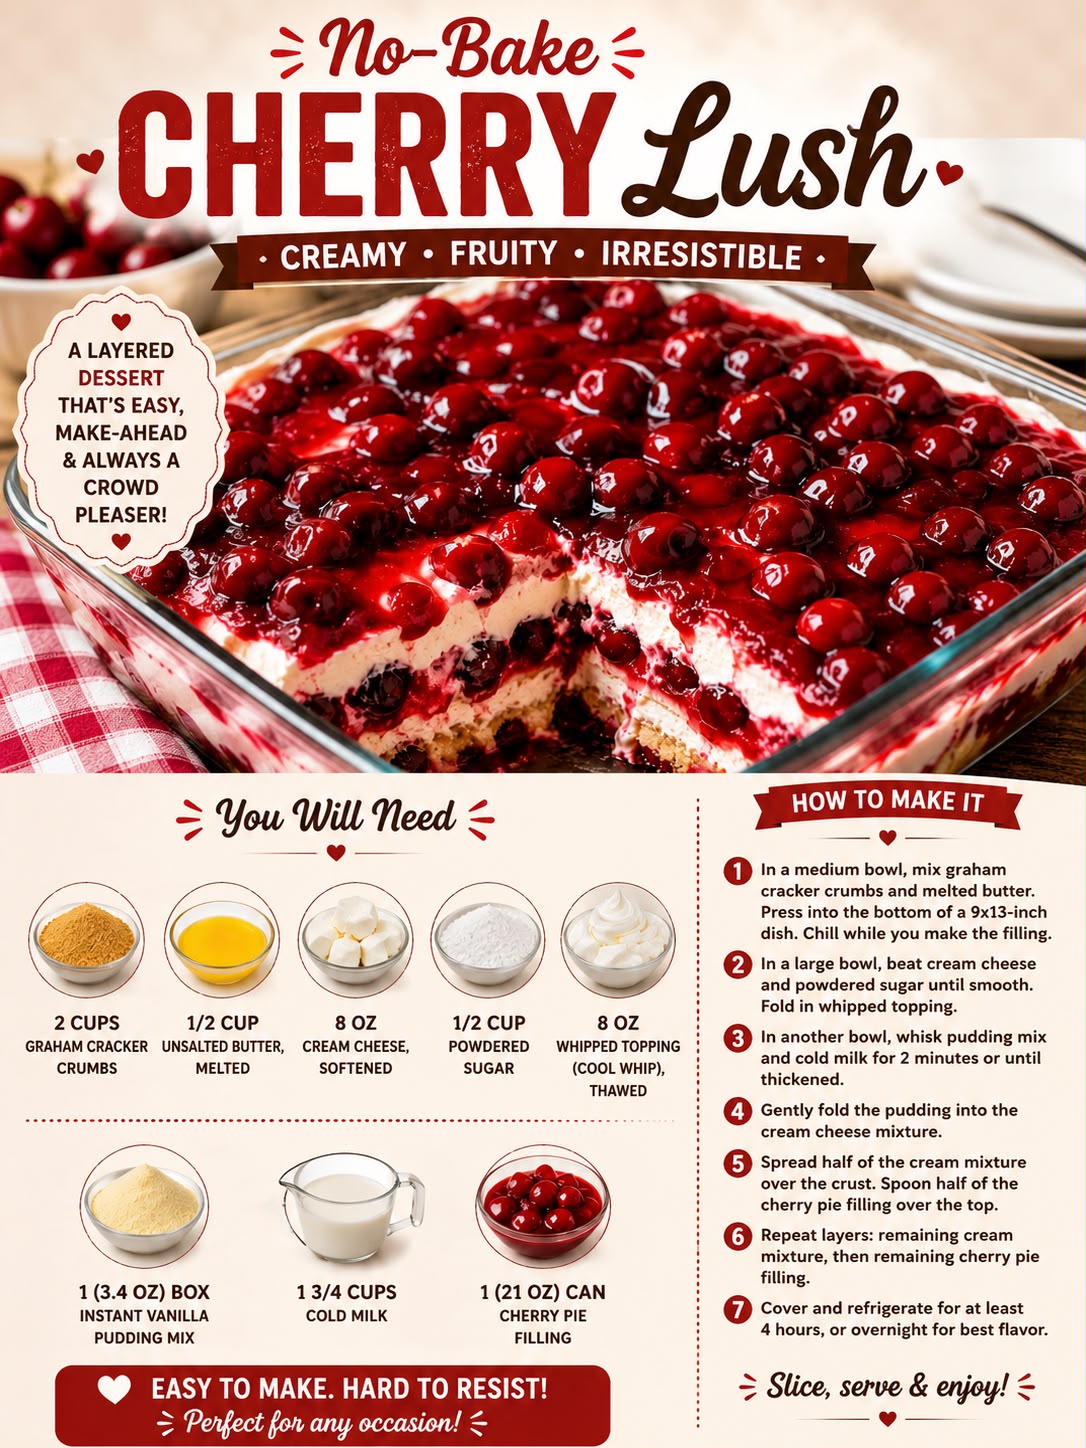
No-Bake Cherry Cheesecake: Easy, Creamy, and Perfect for Any Occasion
No-Bake Cherry Cheesecake is one of those desserts that looks impressive but requires very little effort.
With a buttery graham cracker crust, a smooth cream cheese filling, and a glossy cherry topping, this dessert delivers all the flavor of classic cheesecake without turning on the oven.
It is especially useful during warm weather, when you want a homemade dessert without heating up the kitchen.
This recipe also works beautifully for holidays, family gatherings, potlucks, birthdays, summer cookouts, and easy weekend entertaining.
The best part is that most of the work can be done ahead of time.
Why You’ll Love This No-Bake Cherry Cheesecake
This dessert is simple, creamy, and extremely convenient.
You get:
- No oven required
- Buttery graham cracker crust
- Creamy cheesecake filling
- Sweet cherry topping
- Easy make-ahead preparation
- Simple grocery-store ingredients
- Great presentation
- Perfect slices when properly chilled
It is also easy to customize with different fruit toppings.
Ingredients
For the Graham Cracker Crust
- 2 cups graham cracker crumbs
- ½ cup unsalted butter, melted
- ¼ cup granulated sugar
For the Cheesecake Filling
- 16 ounces cream cheese, softened
- 1 cup powdered sugar
- 1 teaspoon vanilla extract
- 1 tablespoon lemon juice
- 1½ cups heavy whipping cream
For the Cherry Topping
- 1 can cherry pie filling, about 21 ounces
Optional Garnish
- Fresh cherries
- Whipped cream
- Graham cracker crumbs
- White chocolate shavings
Why No-Bake Cheesecake Is So Popular
Traditional cheesecake is delicious, but it can require careful baking, cooling, and sometimes a water bath.
A no-bake version is much easier.
Instead of eggs and baking, the filling gets its structure from cream cheese and whipped cream.
After several hours in the refrigerator, the filling becomes firm enough to slice while remaining soft and creamy.
That makes this style of cheesecake especially practical for beginner bakers.
Choosing the Best Cream Cheese
For the richest texture, use full-fat block-style cream cheese.
Let it soften at room temperature before mixing.
Softened cream cheese blends much more smoothly and helps prevent lumps.
Avoid using cream cheese that is still cold from the refrigerator.
Cold cream cheese can be difficult to combine with powdered sugar and may create an uneven filling.
How to Make No-Bake Cherry Cheesecake
Step 1: Prepare the Pan
Use a 9-inch springform pan if you want a traditional round cheesecake shape.
You can also use a square baking dish if you prefer cheesecake bars.
Lightly grease the bottom or line it with parchment paper for easier serving.
Step 2: Make the Graham Cracker Crust
Combine:
- Graham cracker crumbs
- Melted butter
- Granulated sugar
Mix until the crumbs are evenly coated and resemble wet sand.
Press the mixture firmly into the bottom of the pan.
Use the bottom of a measuring cup or drinking glass to create an even, compact layer.
Step 3: Chill the Crust
Place the crust in the refrigerator while you prepare the filling.
Chilling helps the butter firm up and keeps the crust together.
For an even firmer crust, you can refrigerate it for about 20 to 30 minutes before adding the filling.
Step 4: Beat the Cream Cheese
Place softened cream cheese in a large mixing bowl.
Beat with an electric mixer until smooth and creamy.
Scrape down the sides of the bowl as needed.
This step is important because a smooth cream cheese base creates a much better final texture.
Step 5: Add Powdered Sugar
Gradually add powdered sugar.
Continue beating until fully incorporated.
Powdered sugar dissolves easily and helps keep the filling smooth.
Step 6: Add Vanilla and Lemon Juice
Mix in vanilla extract and lemon juice.
The lemon juice adds a slight tang that balances the sweetness of the cherry topping.
You do not need enough lemon to make the cheesecake taste strongly citrusy.
Step 7: Whip the Heavy Cream
In a separate chilled bowl, beat the heavy whipping cream until stiff peaks form.
This means the cream should hold its shape when you lift the beaters.
Do not overbeat.
Once cream becomes grainy, it is beginning to turn toward butter.
Step 8: Fold the Whipped Cream Into the Filling
Gently fold the whipped cream into the cream cheese mixture.
Use a silicone spatula.
Fold slowly so you do not knock too much air out of the whipped cream.
The final filling should be light, smooth, and fluffy.
Step 9: Fill the Crust
Spoon the cheesecake mixture over the chilled crust.
Spread it into an even layer.
Smooth the top with a spatula.
Step 10: Chill Until Firm
Cover the cheesecake and refrigerate for at least 6 hours.
Overnight chilling is even better.
The longer chill gives the filling enough time to firm up properly.
Step 11: Add the Cherry Topping
Once the cheesecake has set, spoon the cherry pie filling over the top.
Spread it gently so you do not disturb the filling underneath.
For the cleanest presentation, add the topping shortly before serving.
Step 12: Slice and Serve
Run a thin knife around the inside edge of the springform pan.
Release the sides carefully.
For clean slices, use a sharp knife and wipe the blade between cuts.
Serve chilled.