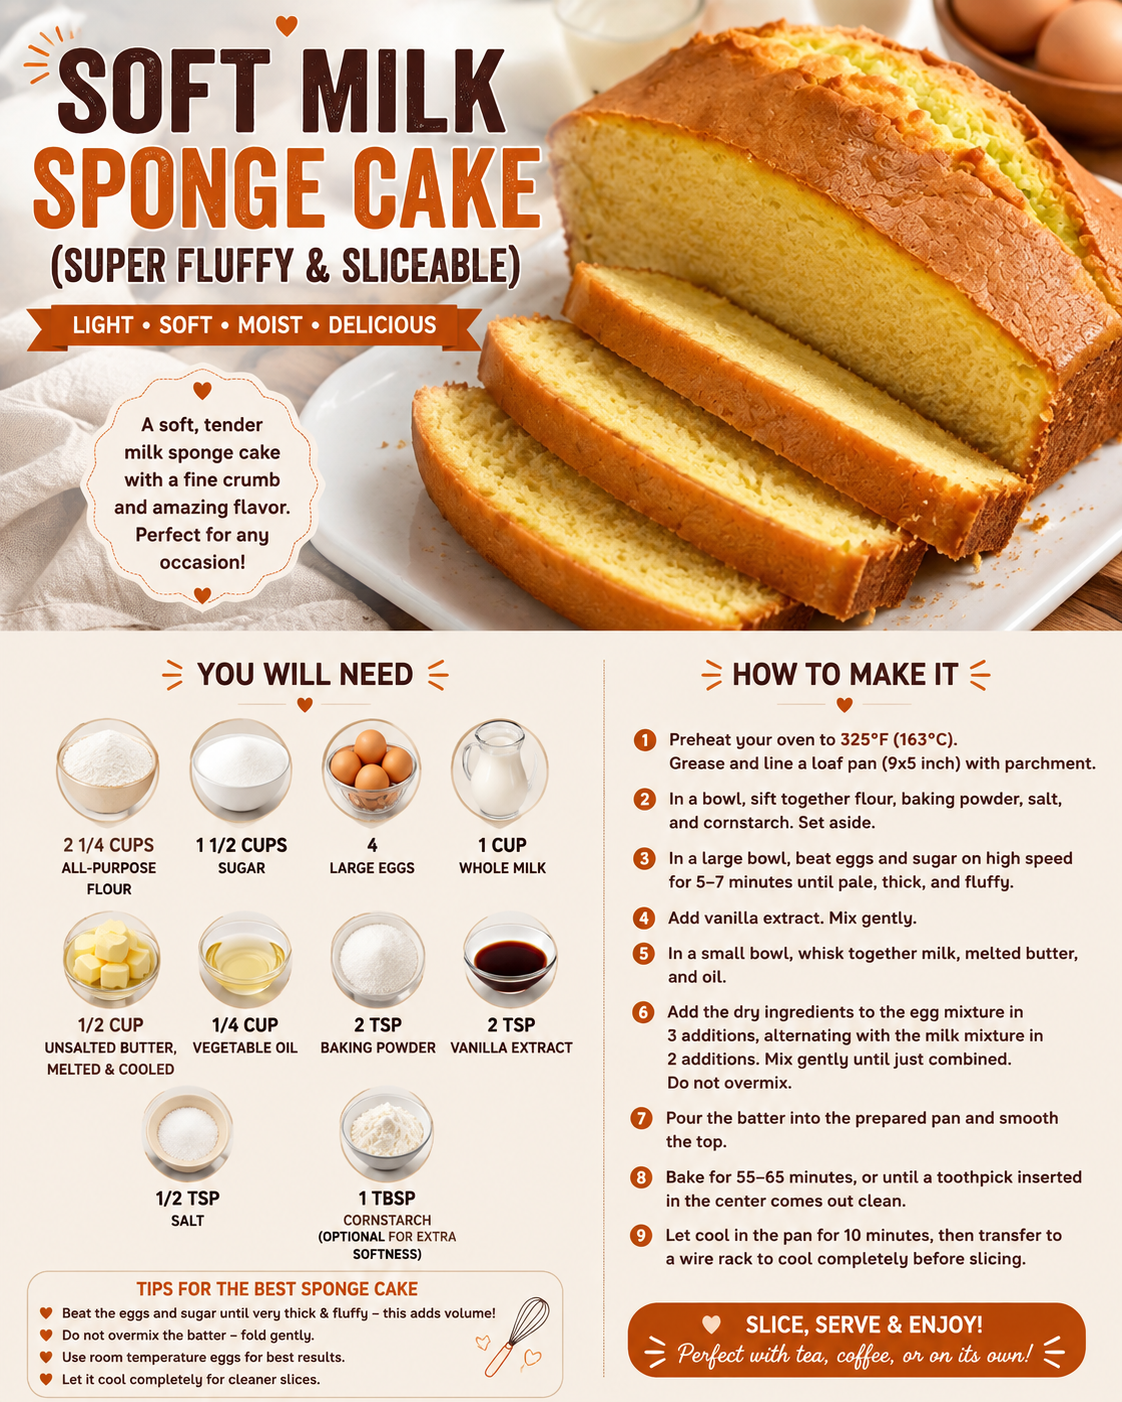
Soft Milk Sponge Cake: Super Fluffy, Light, and Perfect for Slicing
A good sponge cake should feel light, soft, and airy while still being sturdy enough to slice cleanly.
This Soft Milk Sponge Cake delivers exactly that.
Made with room-temperature eggs, sugar, warm milk, flour, and a few simple baking ingredients, this cake rises beautifully and develops a tender crumb that works well for everyday desserts, layered cakes, birthday cakes, strawberry shortcake-style desserts, and afternoon coffee.
Unlike dense butter cakes, this sponge relies heavily on properly whipped eggs for volume.
The result is a cake that feels soft and delicate but remains structured enough for filling, frosting, or slicing into neat layers.
Why You’ll Love This Soft Milk Sponge Cake
This recipe is simple, versatile, and useful for many different desserts.
You get:
- Soft and fluffy texture
- Light crumb
- Easy slicing
- Simple ingredients
- No complicated decorating required
- Great base for layered cakes
- Perfect with fruit and whipped cream
- Excellent make-ahead option
It is especially useful if you want one reliable homemade cake recipe that can be adapted for birthdays, holidays, and family gatherings.
Ingredients
For the Cake
- 4 large eggs, room temperature
- ¾ cup (150 g) granulated sugar
- ½ cup (120 ml) warm milk
- 1 cup (125 g) all-purpose flour
- 1 teaspoon vanilla extract
- 1 teaspoon baking powder
- ¼ teaspoon salt
- 2 tablespoons neutral oil or melted unsalted butter
Optional Flavor Additions
- ½ teaspoon almond extract
- 1 teaspoon lemon zest
- 1 teaspoon orange zest
- Pinch of cinnamon
Optional Toppings
- Powdered sugar
- Fresh strawberries
- Blueberries
- Whipped cream
- Vanilla glaze
What Makes Sponge Cake So Fluffy?
The key is air.
Traditional sponge cakes get much of their lift from whipped eggs rather than relying only on baking powder.
When eggs and sugar are beaten properly, millions of tiny air bubbles become trapped in the mixture.
Those bubbles expand in the oven.
That is what creates the light, airy structure.
For this reason, the mixing technique matters just as much as the ingredient list.
Why Room-Temperature Eggs Matter
Room-temperature eggs generally whip more easily and gain more volume than cold eggs.
They also combine more smoothly with the other ingredients.
If your eggs are cold, place them in a bowl of warm water for several minutes before using them.
Do not use extremely hot water.
You simply want to take the chill off.
Why Use Warm Milk?
Warm milk blends more smoothly into the batter.
It also helps prevent the batter from tightening when the liquid is added.
The milk should be warm, not boiling.
If it is too hot, it can negatively affect the egg foam.
Aim for comfortably warm milk that you can touch without discomfort.
How to Make Soft Milk Sponge Cake
Step 1: Preheat the Oven
Preheat your oven to 325°F to 350°F (165°C to 175°C) depending on your oven and pan.
For a tall sponge cake, a slightly lower temperature can help the cake rise more evenly without browning too quickly.
Prepare an 8-inch round cake pan.
Line the bottom with parchment paper.
Depending on your preferred sponge-cake method, you may leave the sides ungreased so the batter can grip the pan while rising.
Step 2: Prepare the Dry Ingredients
In a medium bowl, whisk together:
- All-purpose flour
- Baking powder
- Salt
For an especially fine crumb, sift the dry ingredients once or twice.
Sifting helps break up flour lumps and makes it easier to fold the dry ingredients into the egg mixture without overmixing.
Step 3: Beat the Eggs and Sugar
Add the room-temperature eggs and granulated sugar to a large mixing bowl.
Using a stand mixer or electric hand mixer, beat on medium-high to high speed.
Continue beating until the mixture becomes:
- Pale
- Thick
- Very fluffy
- Several times larger in volume
This may take several minutes.
Do not stop too early.
The egg mixture creates the foundation of the cake’s structure.
The Ribbon Test
One of the best ways to know whether the eggs are properly whipped is the ribbon test.
Lift the beaters and let some mixture fall back into the bowl.
The batter should fall in a thick ribbon and remain visible on the surface for a few seconds before slowly disappearing.
If it immediately sinks into the mixture, continue beating.
Step 4: Add Vanilla
Add the vanilla extract.
Mix briefly on low speed just until incorporated.
If using lemon zest, orange zest, or almond extract, add it during this stage.
Step 5: Fold in the Flour
Sift part of the dry ingredients over the whipped egg mixture.
Use a large silicone spatula to fold gently.
Move the spatula down through the center, across the bottom, and up the side of the bowl.
Rotate the bowl slightly and repeat.
Continue adding the flour in small batches.
Avoid vigorous stirring.
The goal is to preserve as much trapped air as possible.
Step 6: Combine Milk and Oil
Mix the warm milk with the oil or melted butter.
Take a small amount of cake batter and stir it into the milk mixture.
This step helps equalize the textures.
It makes it easier to incorporate the milk without deflating the entire bowl of batter.
Step 7: Fold in the Milk Mixture
Pour the milk mixture slowly around the edge of the bowl.
Fold gently until no visible streaks remain.
Do not overmix.
Once the batter looks smooth and uniform, stop folding.
Step 8: Fill the Cake Pan
Pour the batter into the prepared pan.
Gently smooth the surface.
Tap the pan lightly against the countertop once or twice to release any very large air bubbles.
Do not tap aggressively because you want to preserve the fine air bubbles responsible for the soft texture.
Step 9: Bake
Place the cake in the center of the oven.
Bake for approximately 30 to 40 minutes, depending on:
- Pan size
- Oven temperature
- Batter depth
- Your specific oven
Avoid opening the oven door during the early stages of baking.
A sudden temperature drop may cause the cake to collapse.
Step 10: Check for Doneness
The cake is ready when:
- The top is lightly golden
- The center springs back when touched gently
- A toothpick inserted near the center comes out clean
Do not overbake.
Overbaking is one of the easiest ways to turn a soft sponge into a dry cake.
Step 11: Cool Properly
Remove the cake from the oven.
Allow it to cool briefly according to your pan style.
Carefully release the edges with a thin knife if necessary.
Transfer the cake to a cooling rack and allow it to cool completely before slicing.
Cooling completely is important if you plan to create cake layers.